How To: Submit a ticket and assign a service item in Ubersmith

Welcome to another of our Ubersmith ‘how to’ guides!
For this post we’re going to walk you through one of the most common questions we get asked in the support department.
“How do I submit a support ticket and associate a service item?”
There will no doubt be a time where you need to contact us, whether it be for sales, support or just to ask a question. While you can contact us by email, we recommend that you log into our account management portal to submit a ticket. Submitting a ticket from within the portal means you can associate the service item in question which helps us to quickly and easily identify the service that you’re contacting us about.
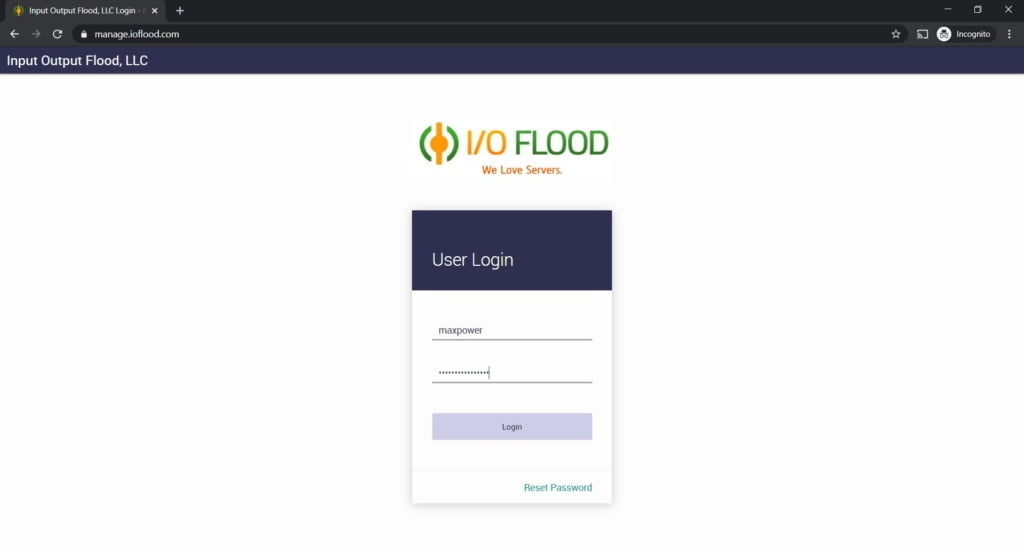
First of all, you will need to go to the IOFlood account management portal and log into your IOFlood account by putting in your username and password, just like our friend Max here did.
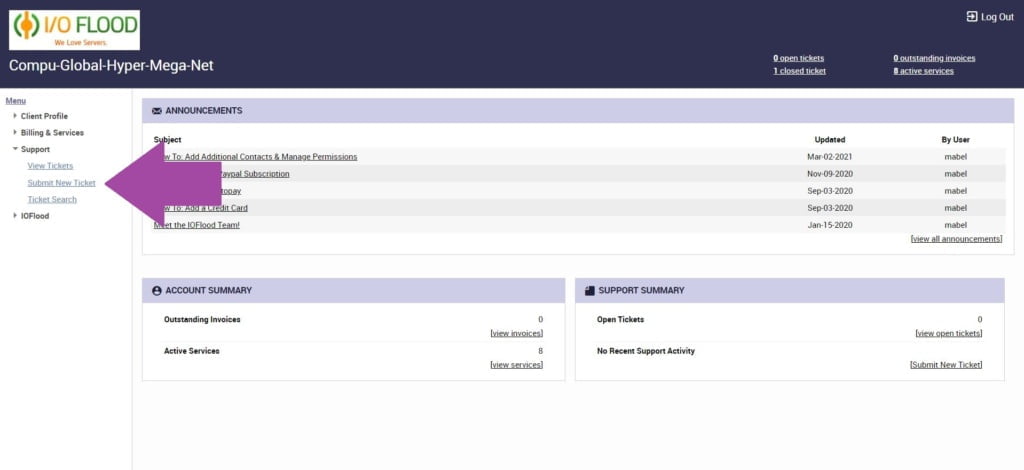
Once you’ve logged in, you need to navigate to the menu on the left side of the page and under ‘Support’ you need to select “Submit New Ticket” from the drop down menu.
Once you click to ‘Submit New Ticket’ a popup window will appear that looks like this.

First things first, you can select which contact you want to use, and you can add a CC from your contacts list if you want to from the drop down menus located here:

Once you’ve selected your contacts, you can fill in the email subject and content.
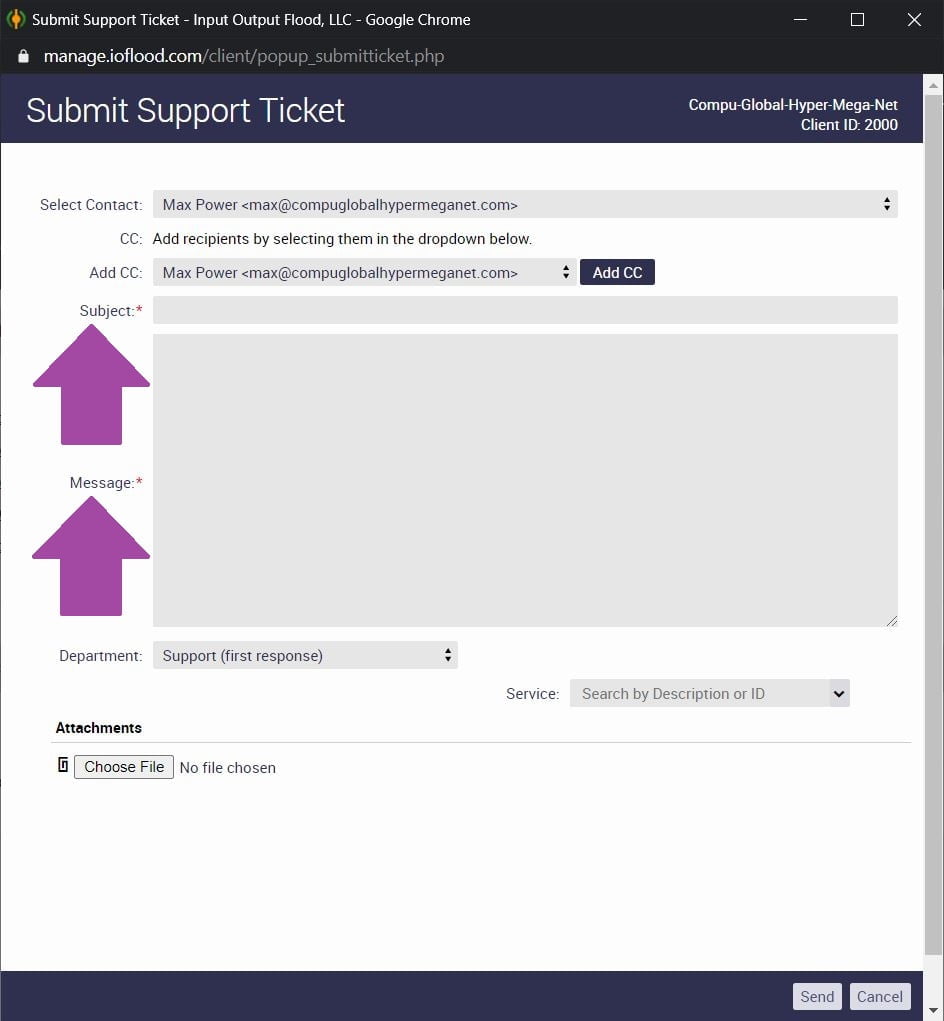
- Please note: Both subject and message are required and must be completed!
If your ticket is a support request or has something to do we strongly recommend that you associate the ticket with the service in question to help make it easier for us to identify which server you’re contacting us about. Associating the service item is easy, as you can see here:

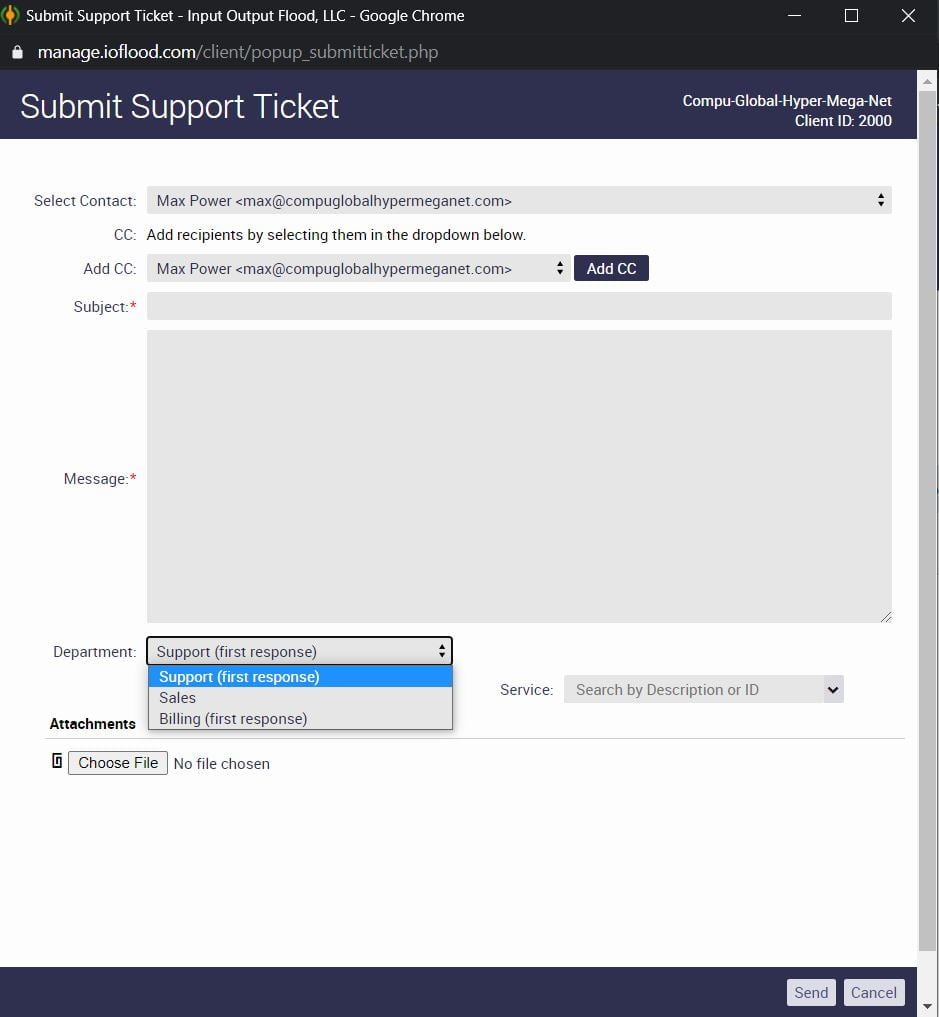
You can choose which department you want to assign the ticket to. You can assign the ticket to a specific department by using this drop down menu here:
Now that you’ve got your message complete and your service item associated, all you need to do is click send!

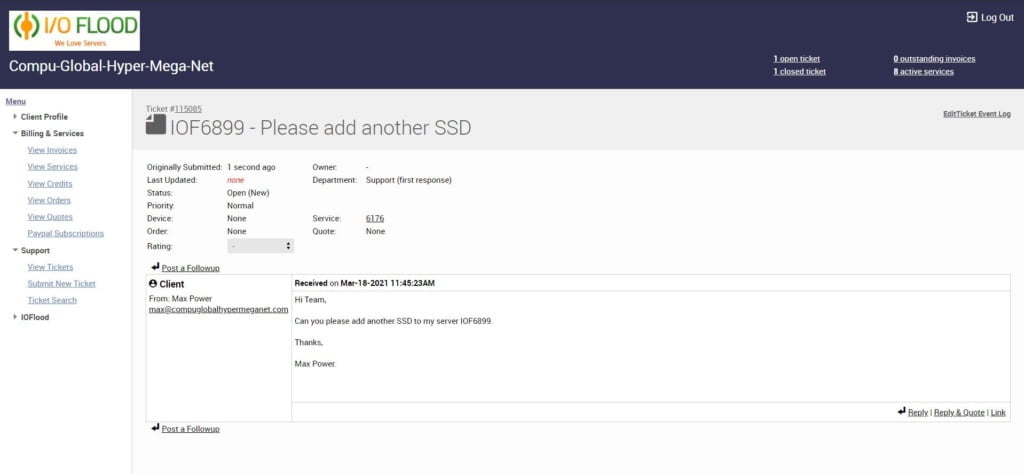
Once you’ve sent the email, you will automatically be redirected to the open ticket in your account management portal.
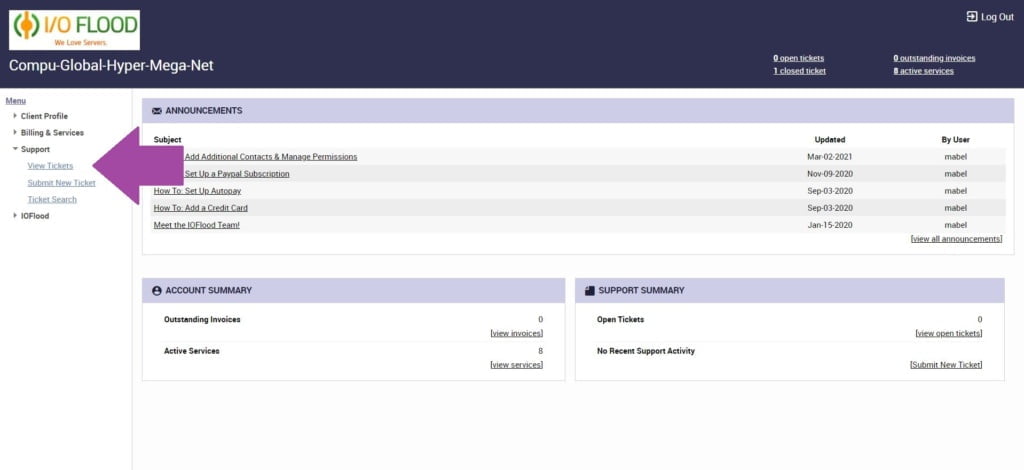
When our staff reply to the ticket, you will be notified by email on the contact email address you assigned to the ticket earlier, but you can also check the status of your ticket at any time by logging in to your account and clicking “View Tickets” from under “Support” in the menu on the left.
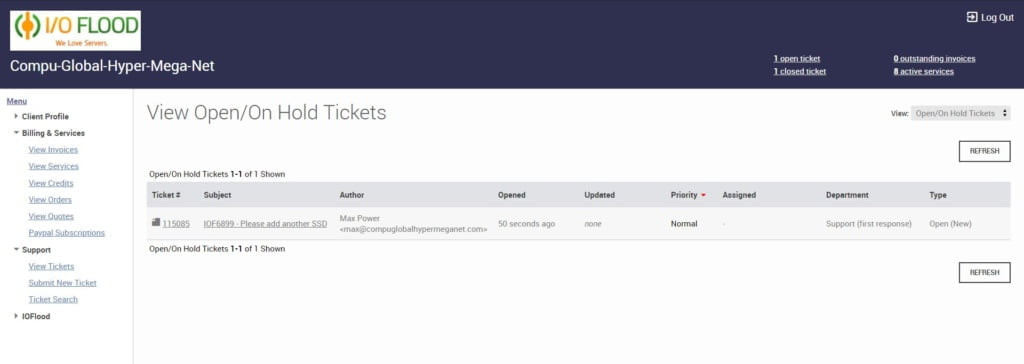
This will bring up a list of all tickets you currently have open with us.
So there you have it! Ubersmith makes it easy to request support, sales or billing assistance simply by logging into your account management portal and opening a ticket, and the best part is, it only takes a few minutes!
I hope you’ve enjoyed this most recent addition to our ‘how to’ guides for Ubersmith, all designed to help make managing your business easier.
Please make sure you check back on our blog regularly as we will be doing more of these ‘how to’ posts to help our customers navigate through their customer portals.

