How To: Add a Contact in Ubersmith

Welcome to another of our Ubersmith ‘how to’ guides!
For this post we’re going to walk you through one of the most common questions we get asked in the support department.
“How do I add additional contacts to my account?”
We know that sometimes it takes lots of hands to help run a business, especially when you’re dealing with so many different aspects of day to day operation, many customers find it easier to assign contacts for specific roles, especially roles like ‘abuse’ or ‘billing’ that may require a more specific knowledge base.
Thankfully, Ubersmith makes it incredibly easy to add additional contact points to your account, and you can do so in a few simple steps, as we have outlined for you below.
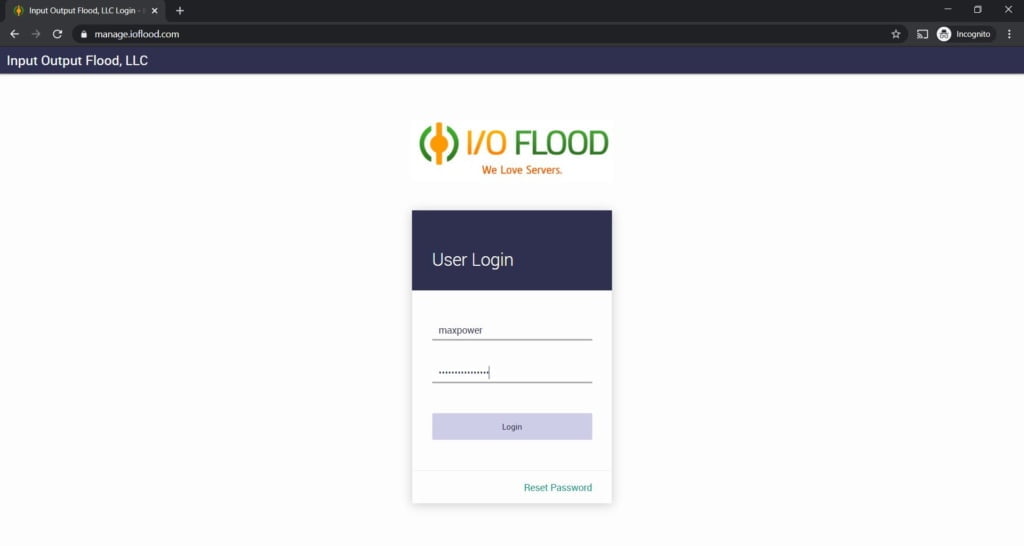
First of all, you will need to go to the IOFlood account management portal and log into your IOFlood account by putting in your username and password, just like our friend Max here did.

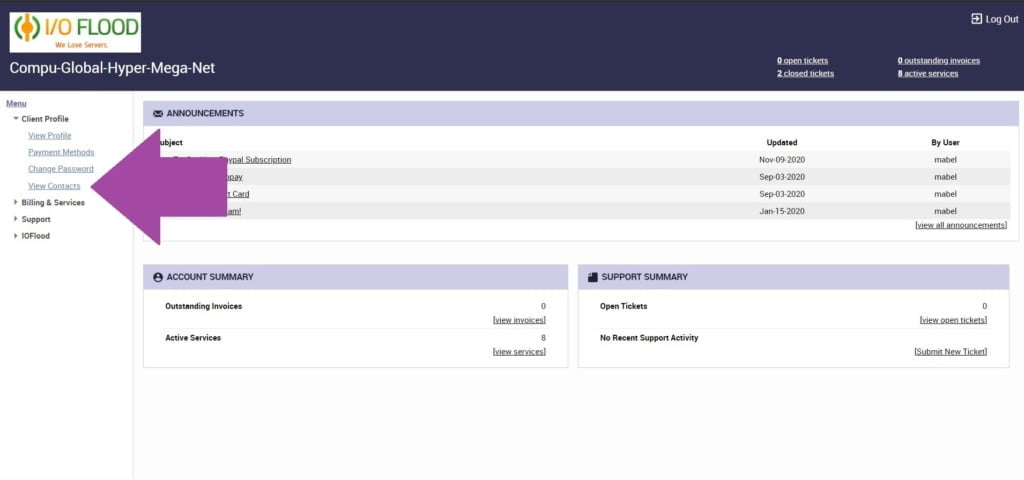
Once you’ve logged in, you need to navigate to the menu on the left side of the page and under ‘Client Profile’ you need to select “View Contacts” from the drop down menu.

Once you’ve navigated to the Contacts screen, you’ll see a list of all your existing contacts, that will look something like this:

To add a new contact, we start by clicking on the”ADD CONTACT” button at the top of the screen:

Which will bring up a popup window that looks like this:

As you can see, there are three sections that need to be completed:
Contact Details:
This should contain the name and email address of the person you wish to have assigned to this role. In this instance, we are adding a billing contact, Minnie Power. Should we need to contact the company regarding billing issues, this will be the contact we use.
Audit Account:
Important Note: If you check the ‘Audit Account’ box here, it means this contact will be CC’d on every email received via Ubersmith, this will include all billing, support, admin and abuse notifications, as well as any other general correspondence that may be sent.

Login and Password:
It’s important to make sure that your password you use is secure and that it is stored securely. There are plenty of great random password generators online that can create very secure passwords, or you can use the ‘auto generate’ function provided by Ubersmith. You can also make use of one of the many online secure online password repositories to store passwords.

Roles:
This would be the role you would like to have assigned to this contact. The primary roles assigned for additional contacts would be ‘abuse’, ‘billing’ or ‘support’.
It is important to note at this point that each ‘Role’ has it’s own set of permissions and differing levels of access within Ubersmith. I have outlined those permissions for you below:
Abuse:
The Abuse Role has permissions to view and update Support. Abuse roles can view, update and submit support tickets. Abuse role also can view service items. Abuse role will be sent all abuse related complaints and notifications.
Billing:
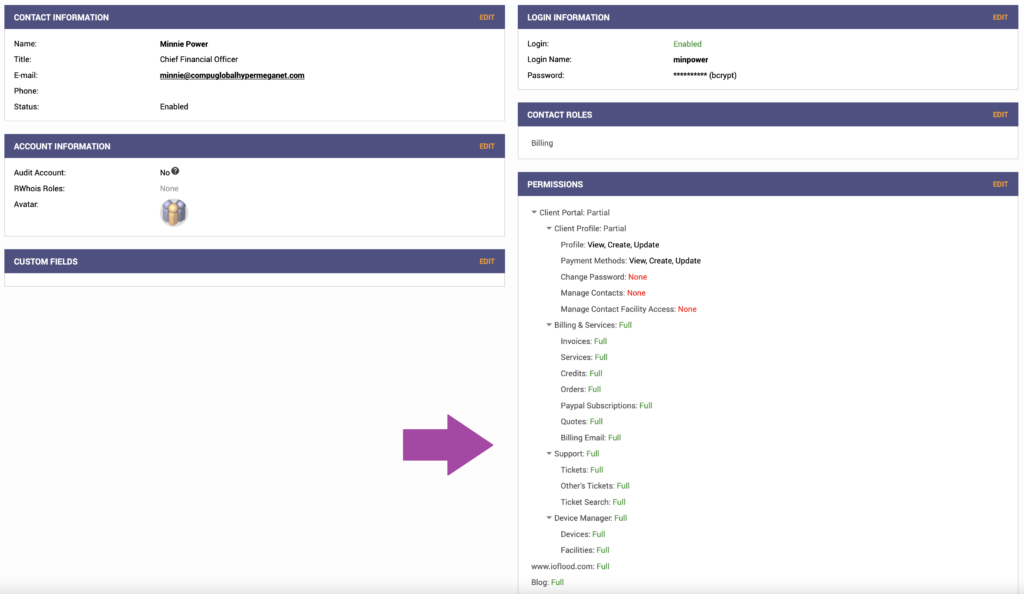
The Billing Role has permissions to view and update Payment Methods, Invoices, Services, Credits, Orders, Paypal Subscription and Client Profile. If this role is selected all invoices and billing notifications will be sent to this email on file.
Support:
The Support Role has permissions to view and update Support. Support role can view, update and submit support tickets. Support role can view service items.
Admin:
The Admin Role has full access to all fields. Admin Role can add, delete and manage contact users.

As this contact has been assigned a Billing role, you can see the specific permissions in this screenshot.

Once you’ve filled in all three sections, just click ‘save’ at the bottom:

Once you’ve saved it, you will be automatically redirected back to the client list you were initially in, which should now display the new contact that you have just added.

And it really is as simple as that to add new contacts to help share the workload in your business.
I hope you’ve enjoyed this most recent addition to our ‘how to’ guides for Ubersmith, all designed to help make managing your business easier.
Please make sure you check back on our blog regularly as we will be doing more of these ‘how to’ posts to help our customers navigate through their customer portals.


